Customer Template Maintenance
Customer templates for pricing multipliers can be edited and maintained with the Customer Template Maintenance tool in Bid Manager.
Procedures in this Job Aid:
· Add the Customer Template Maintenance Tool to your Home Screen
· Maintaining Existing Templates
· Filtering Customer Templates
Add the Customer Template Maintenance Tool to your Home Screen
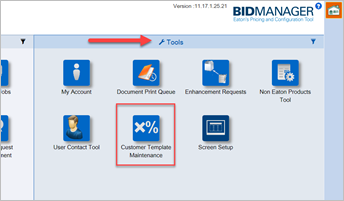
1. On the Bid Manager home screen, click the Screen Setup button or click on the Tools header.
2. In the Tools tab, select the Customer Template Maintenance item to add it to your home screen.
3. Click OK to close the Screen Setup.
Maintaining Existing Templates
Customer templates have been copied from the classic Bid Manager database and are now manageable from within the new Bid Manager application only.
Editing an Existing Template
Existing Templates can be edited by any Eaton Salesperson who has access to the template that matches their sales geography.
1. Double-click on a template to open it or, select a line and click the Open button from the Template top tab buttons.

Note: Depending on your screen resolution, you may need to scroll within the window to see all the available templates. Columns in the list are easily sorted in ascending and descending order by clicking on the column header (more information about sorting columns).
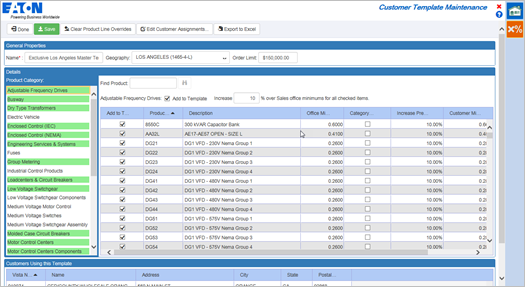
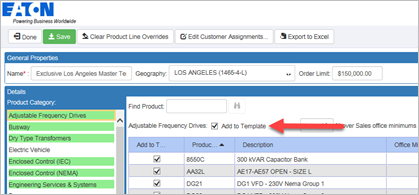
2. Product Categories that are included in a template are highlighted in green. To modify a product code, select the product category from the list on the left side.
Note: To go back to the Template list, click on the Done button. If you have made any changes, you will be prompted to first save. To discard changes, do not save.
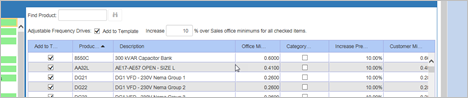
3. Use the Find Product field to find a product code quickly. The line will automatically appear highlighted when you search for a product code.
4. The product list to the right will be populated with all the product codes that are associated with the selected product category. Check or un-check the product codes to be included in the template.
5. Optionally, check or un-check the Add to Template option to add or remove all product codes at once.
6. All Office Minimum multipliers automatically copy to the Customer Multiplier column.
7. Increase values simultaneously for all checked items by using the % over Sales office minimum selection.
8. Check the Category Override box to change individual product code lines.
9. The Category Overrides for a product category can be cleared all at once by clicking on the Clear Product Line Overrides button.
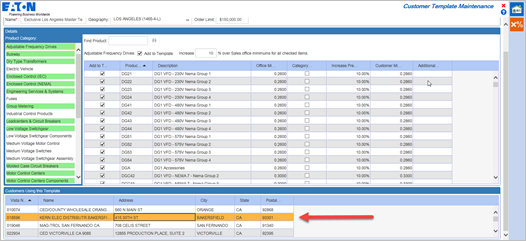
10. Customers that are associated with this template will appear in the list at the bottom of the template. Double-Click on a customer to see the individual Bid Manager users that are listed for that customer.
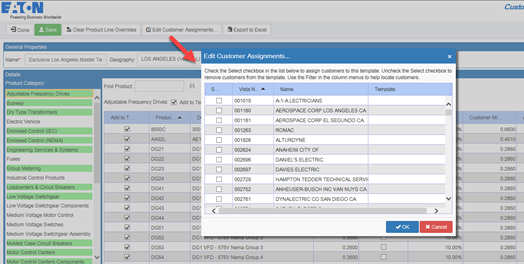
11. From the Edit Template button ribbon at the top of the screen, click on the Edit Customer Assignments button to change or add customers to the template.
12. Customers can be assigned from this window or from the Templates tab. To add customer assignments select the customer in the prompt with the check box next to their name.
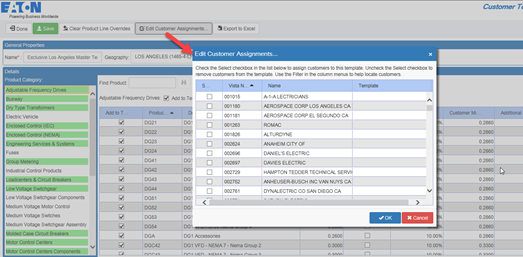
Note: Start typing the Vista Number or Name of the customer in the Filter field and the results will automatically appear.
13. To close an open template, click on the Done button. If you have made any changes, you will be prompted to save your template.
Duplicating Existing Templates
Duplicating an existing template allows you to create multiple similar templates from a master template.
1. To duplicate an existing template, select the template by clicking on it once to highlight it, then click the Duplicate button.
2. Name the new duplicate template.
3. Click OK.
Assign an Existing Template to a Customer
1. Click on the Customer tab.
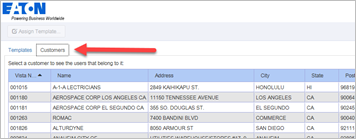
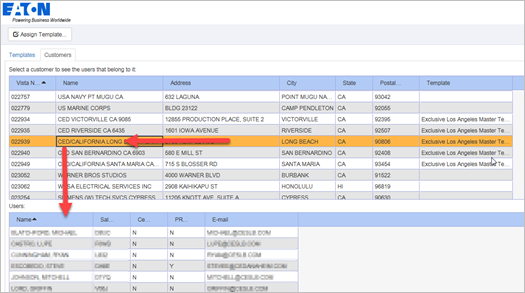
2. Click on a customer line to see the Bid Manager users for that customer displayed below in the bottom of the window.
3. Click the Assign Template button to assign a template to the selected customer.
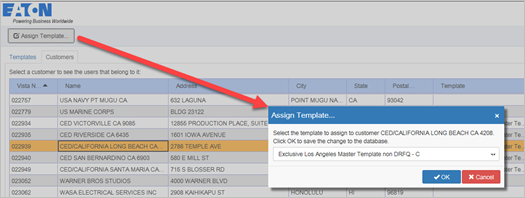
4. Choose a template from the drop down menu and click OK.
5. The template for that customer will display in the column to the right of the customer location.
Exporting a Template to Excel
Click on the Export to Excel button to view the template in a .xml format. You can save this file to your computer for future reference.
Creating a New Template
When creating a new template, no products will be included in the template until selected. All multipliers default to the office minimum for the customer minimum column.
1. To add a new template, click on the New button.

2. In the General Properties, Name the template, select the Geography that the template will assigned to, and enter an Order Limit.
Adding Products to a New Template
1. In the left side Product Category column, scroll to find the product you wish to add to the template.
2. Place a check mark in the Add to Template box in the header of the product list
Note: Columns in the list are easily sorted in ascending and descending order by clicking on the column header.
3. Place a check mark next to the Product Code that will have modified a pricing multiplier and will be included in the template.
4. Optionally, search for a product by using the Find Product search field in the Edit Template top tab.
5. Choose products and modify the multipliers as necessary. Once finished with all changes, click Save.
Adding Customers in a New Template
1. Customers can be assigned from this window or from the Templates tab. To add customer assignments to this template from here, click on the Edit Customer Assignments button and select the customer in the prompt.
Note: Start typing the Vista Number or Name of the customer in the Filter field and the results will automatically appear.
2. Place a check mark next to the customers to be added to the template.
3. Click OK.
Filtering Customer Templates
The columns of the customer template list can be modified to help filter and sort templates.
1. Navigate to the Customers tab.
2. Hover the mouse over the column you want to filter.
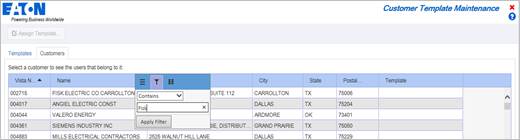
3. Click the filter icon to type in a filtering parameter.

4. To remove a filter, click the X to the right of the word or number you are filtering on. Then, click Apply Filter again.